(Fixed) Lawn Mower Lights Not Working – 4 Easy Solutions
Lawn mower lights are vital in providing visibility and safety while operating the mower late at night.
However, just like any other electrical component, they can have issues that result in malfunctioning. The first step toward finding a solution is finding the root cause of the problem.
These lights could’ve gone out for several reasons. The connections might’ve been loose, the battery might malfunction, the bulbs are not working, or the fuse is blown.
In this guide, I’ll go over all these reasons that may have caused your lawn mower lights to stop working and provide step-by-step instructions to help you diagnose the issue.
Without any further ado, let’s get started.
4 Fixes for the Lawn Mower Lights Not Working Problem
Checking the Connections
Loose or faulty connections are among the most common causes of lawn mower light failure.
Over time, vibrations and outdoor elements can cause the wiring connections to become loose or corrode, resulting in poor electrical contact.
Follow these steps to inspect the connections:
1. Safety First
Before starting any inspection, ensure that the lawn mower is turned off and the ignition key is removed to prevent accidental starts.
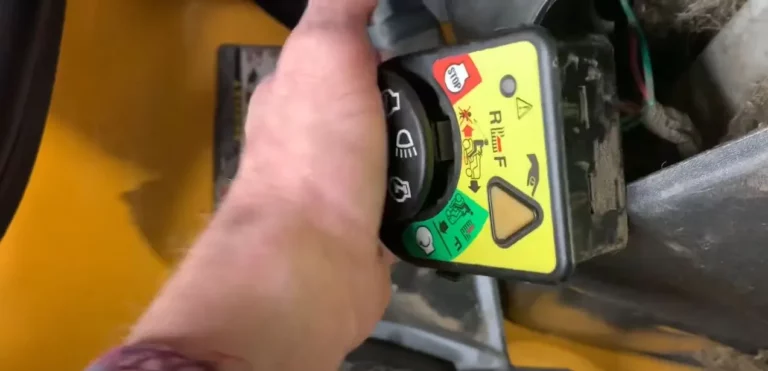
2. Locate the Light Connections
Depending on your mower model, the light connections are typically found near the front or back of the machine. They are usually housed in a protective casing or attached to the wiring harness.
3. Visual Inspection
Carefully examine the connections for any signs of corrosion, rust, or loose wires. Corrosion appears as a greenish or blueish substance on metal surfaces.
If you notice corrosion, gently clean it using a wire brush or sandpaper to restore proper conductivity.
4. Tighten Bad Connections
Tighten any loose connections with a screwdriver or pliers. Check that the wires are securely connected to their terminals and are not damaged. If you find any damaged wires, they may need to be repaired or replaced.
5. Test the Lights
Reinsert the ignition key and turn on the lawn mower once the connections are cleaned and tightened. Check to see if the lights are now working properly. If they still don’t work, move on to the next troubleshooting step.
Also Read: Scotts Spreader Settings Conversion Chart – Complete Guide
Testing the Battery
A weak or dead battery can be a common culprit behind non-functioning lawn mower lights.
If the lights are not turning on despite checking the connections, it’s important to test the battery to determine if it’s the source of the problem.
Follow these steps to test the battery:
1. Safety Precautions
Ensure the lawn mower is turned off, the ignition key is removed, and any electrical components are switched off before you start diagnosing.
2. Check Battery Connections
Look at the battery terminals for signs of corrosion or loose connections. Corrosion can hinder the flow of electricity, leading to a weak battery.
Use a battery terminal cleaner or a baking soda and water solution to remove corrosion.
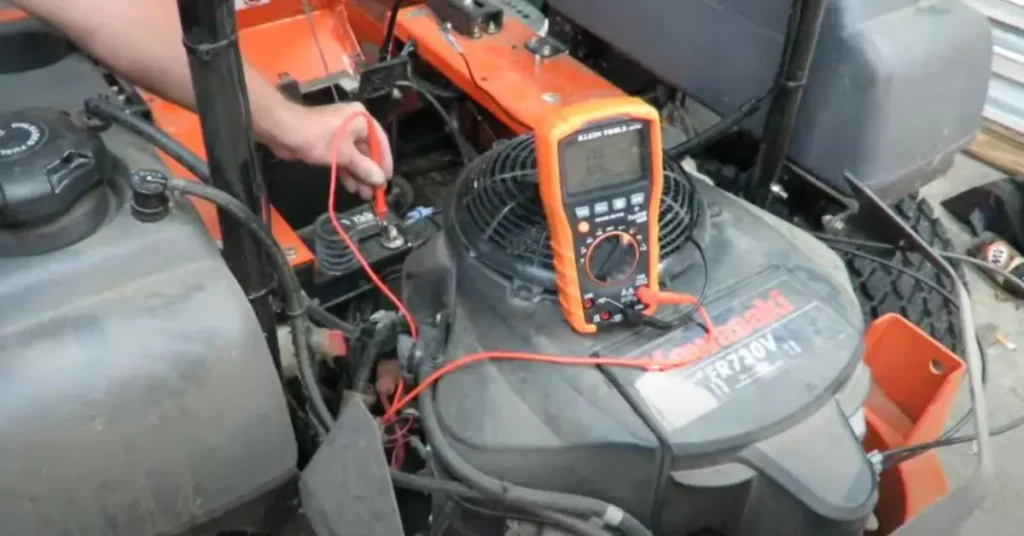
3. Measure the Battery Voltage
Use a multimeter and attach the positive (red) and negative (black) probes to the positive and negative terminals of the battery, respectively.
Read the voltage displayed on the multimeter.
4. Interpret the Voltage Reading
A fully charged 12-volt battery should read around 12.6 to 12.8 volts. If the reading is significantly lower, it indicates a weak or uncharged battery.
In such cases, you may need to charge or replace the battery.
5. Charge or Replace the Battery
If the voltage reading is low, recharge the battery using an appropriate charger according to the manufacturer’s instructions.
If the battery fails to be charged or is seriously damaged, it may be time to replace it with a new one.
Replacing the Light Bulbs
If you’ve checked the connections and tested the battery, but your lawn mower lights are still not working, it may be time to replace the light bulbs.
Over time, bulbs can burn out or become damaged, resulting in a significant loss.
Follow these steps to replace the light bulbs on your lawn mower:
1. Identify the Bulb Type
See your mower’s manual or the labels on the existing bulbs to know the type and power supply of the light bulbs needed.
Ensure you purchase bulbs that match the specifications of your mower.
2. Safety First
Turn off the lawn mower and remove the ignition key. Allow the mower to cool down, especially if it has recently been used.
3. Access the Bulb Holder
Locate the bulb area on the mower. Depending on your mower model, it may be found on the machine’s front, back, or sides. Some bulb holders require the removal of a cover or lens to access the bulbs.
4. Remove the Old Bulbs
Carefully twist or unclip the old bulbs from their sockets. Sometimes, you may need to push and turn the bulb anticlockwise to remove it gently.
Note the bulb’s orientation to ensure the correct installation of the new one.
5. Insert the New Bulbs
Align the new bulbs with the sockets. Firmly push and twist them clockwise until they are securely in place. Ensure they are properly seated to establish a good electrical connection.
6. Test the Lights
Reinsert the ignition key and turn on the lawn mower. Check to see if the new bulbs are working correctly.
If the lights are now working, congratulations on successfully replacing the bulbs. Otherwise, move on to the next troubleshooting step.
Also Read: Lawn Mower Overheating Symptoms (6 Reasons & Solutions)
Checking the Fuse
If your lawn mower lights are still not working after inspecting the connections, testing the battery, replacing the light bulbs, and inspecting the switch, try checking the fuse.
A blown fuse can cause the lights to stop working properly.
Follow these steps to check the fuse:
1. Safety Precautions
Remove the ignition key and shut off the lawnmower. Ensure all electrical components are switched off before proceeding.
2. Locate the Fuse
The fuse is normally located in the electrical compartment of the lawn mower. See your mower’s manual for clarification on the fuse’s exact location.
3. Remove the Fuse
Carefully remove the fuse from its socket with needle-nose pliers or fuse pullers.
Inspect the fuse for any signs of damage or a blown component. A blown fuse will have a visible gap or melted material inside.
4. Check the Fuse Rating
Verify that the fuse you removed matches the correct rating specified in your mower’s manual. Using a fuse with the wrong rating may result in harm or further problems with the electrical system.
5. Replace the Fuse
Replace the blown fuse with a fresh one that has the same rating. Make sure the replacement fuse is designed for the specific purpose of your lawn mower lights.
6. Test the Lights
Reinsert the fuse into the appropriate socket. Switch on the lights and the lawnmower. Check if the lights are now functioning correctly.
Frequently Asked Questions (FAQs)
Do the light bulbs in my lawn mower need to be replaced?
If the light bulbs in your lawn mower are not working, you can check them visually for any signs of damage or burning out.
You can check the bulb’s power using a multimeter to see if it is in good condition. The bulb might need to be replaced if it fails the power test.
Can I use LED bulbs as replacements for my lawn mower lights?
In many cases, LED bulbs can replace traditional bulbs in lawn mower lights. LED bulbs offer advantages such as lower power consumption, a longer lifespan, and brighter illumination.
It is, however, important to ensure compatibility with your specific lawn mower model and stick to the manufacturer’s recommendations.
Why did my lawn mower lights suddenly stop working while in use?
The sudden loss of lawn mower lights during operation can be due to various factors. One common cause is a loose or disconnected wire. This happens due to vibrations or rough terrain.
Check the connections around the light fixing area and the switch to ensure they are secure. A faulty regulator or alternator could also be disrupting the electrical system.
Conclusion
Troubleshooting non-working lawn mower lights can be a step-by-step process.
You can identify and resolve common issues by checking the connections, testing the battery, replacing the light bulbs, inspecting the switch, and checking the fuse.
I guarantee you will find and fix the problem by following these steps. However, keep the safety precautions in mind. Otherwise, you will be vulnerable to serious damage.