
Scotts Edgeguard Spreader Settings? (Best Settings) 2024
Choosing the correct Scotts Edgeguard spreader settings can be challenging, especially for those new to lawn care. Various factors need consideration, such as determining the appropriate amount of fertilizer required and understanding how to measure the lawn in conjunction with the chosen setting. Fortunately, we will guide you through each step in a simple and comprehensive manner. Follow this step-by-step guide to achieve successful calibration for your Scotts Spreader.
Step 1: Gather Your Materials
Before you begin the calibration process, make sure you have the following materials on hand:
Scotts Spreader
The specific fertilizer or seed you intend to use
Measuring cups
Marker or tape
Calculator
Test area marked for calibration
Step 2: Choose a Test Area
Select a test area in your lawn that represents the average conditions you’ll encounter during regular use. This could be a 1000 square foot section, for example.
Step 3: Measure the Test Area
Measure and mark off the chosen test area accurately. Use a measuring tape or other appropriate tools to define the boundaries of the space.
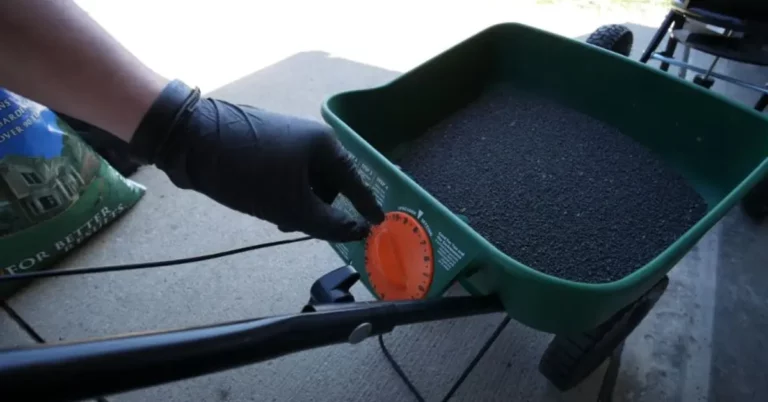
Step 4: Fill the Spreader
Fill the hopper of your Scotts Spreader with a known quantity of the fertilizer or seed. Refer to the product packaging for the recommended application rate per 1000 square feet.
Step 5: Set the Spreader to a Starting Point
Set the spreader to an arbitrary setting, usually in the middle of the dial, to establish a starting point for calibration.
Step 6: Calibrate Over the Test Area
Walk the spreader over the marked test area while it’s operating. Ensure the material is being dispensed evenly.
Step 7: Measure the Applied Material
After covering the test area, measure the remaining fertilizer or seed in the hopper. The difference between the initial amount and the remaining amount represents the amount applied over the test area.
Step 8: Adjust the Spreader Setting
Use the calculator to determine the difference between the recommended application rate and the actual application rate. Adjust the spreader setting accordingly. For example, if you applied more than recommended, decrease the setting; if less, increase the setting.
Step 9: Repeat the Process
Repeat the calibration process until the actual application rate matches the recommended rate. This may require multiple adjustments and test runs.
Step 10: Mark the Ideal Setting
Once you find the ideal setting for your specific material, mark it on the spreader using a permanent marker or tape. This eliminates the need to recalibrate each time you use the same product.
Tips for Successful Calibration:
Calibrate the spreader on a flat surface for more accurate results.
Check the calibration regularly, especially if you switch between different lawn care products.
Consider seasonal adjustments based on temperature and humidity.
By following these steps and regularly calibrating your Scotts Spreader, you’ll ensure precise application and promote a healthy, vibrant lawn. Calibration is a small investment of time that pays off in the long run, contributing to the success of your lawn care efforts.
Also Read: Scotts Spreader Settings Conversion Chart – Complete Guide
What Sets Scotts Edgeguard Spreaders Apart?
Scotts Edgeguard spreaders feature a unique curved design that creates a protective barrier around the perimeter of the spreader. This prevents materials from scattering outside the targeted lawn area. Key benefits include:
- Cleaner application using less product
- Reduced waste from overspray
- More uniform, consistent coverage
- Crisp lines along landscaping beds and hardscapes

The tapered edgeguard ramp allows granules to slowly discharge from the spreader, resulting in an even 6-foot spread pattern. This is ideal for uniform coverage and overlapping passes.
Range of Scotts Broadcast Spreaders
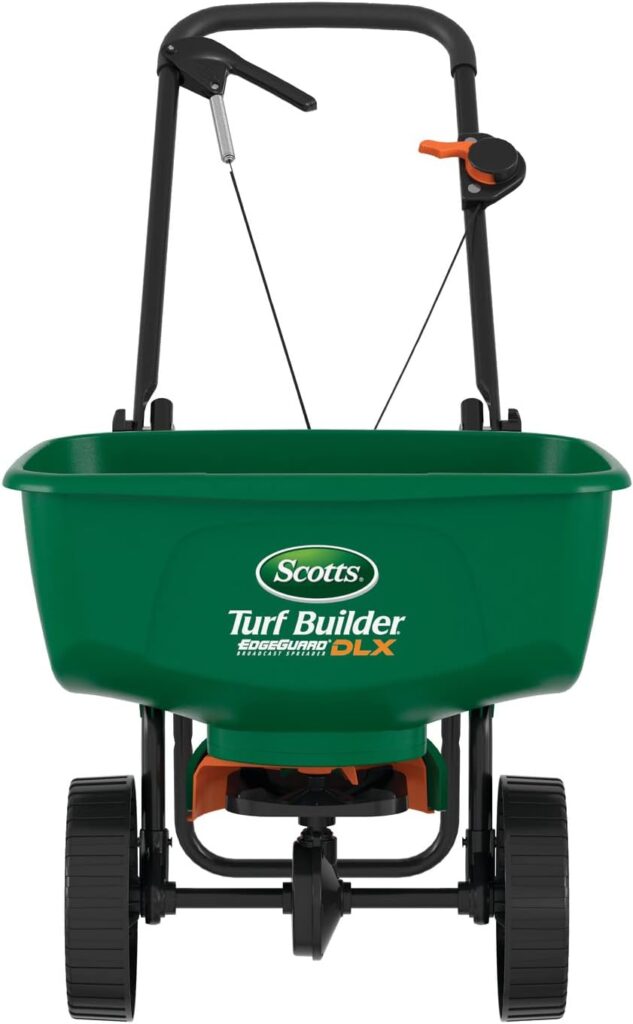
The Scotts Edgeguard line includes broadcast push spreaders in various sizes:
- Scotts Edgeguard Mini – Lightweight and maneuverable for small, tight spaces
- Scotts Edgeguard DLX – Durable mid-size spreader perfect for average lawns
- Scotts Edgeguard Max – Commercial grade and heavy duty for large yards
Rotary and handheld Scotts spreaders also utilize Edgeguard technology to prevent stray granules. This guide will focus specifically on getting the most out of popular push models like the Mini and DLX in the upcoming 2024 lawn care season.
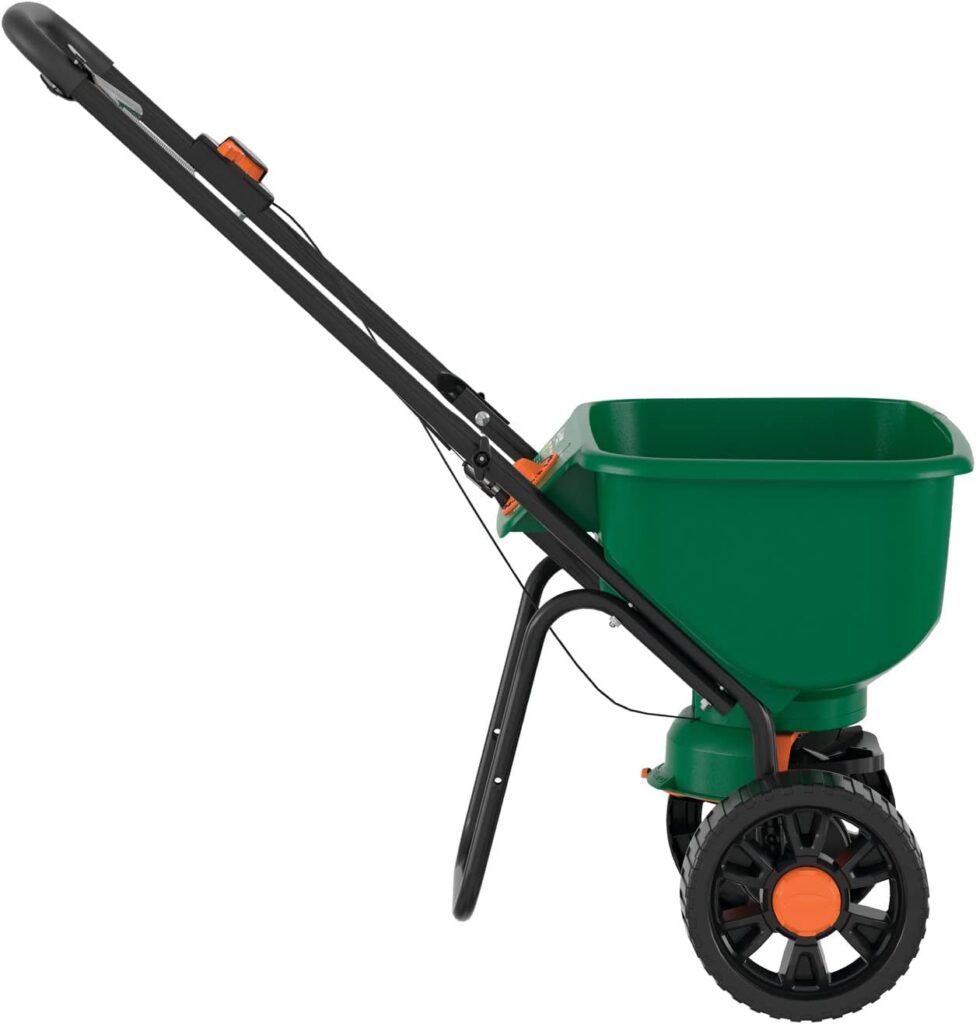
Getting to Know Your Scotts Edgeguard Spreader
Scotts Edgeguard broadcast spreaders have a durable yet lightweight frame with key components that allow for precise material dispensing. Familiarizing yourself with these parts will help ensure proper operation and application accuracy.
Gearbox
The gearbox houses the spreader’s spinning disc mechanism which broadcasts materials as you push the spreader. The rugged, 6-inch polyurethane wheels on DLX models are equipped with sealed ball bearings on the gear axles for smooth rolling.
What to know:
- Keep gears lubricated and inspect for worn teeth
- Check wheels for cracks and keep tread debris-free
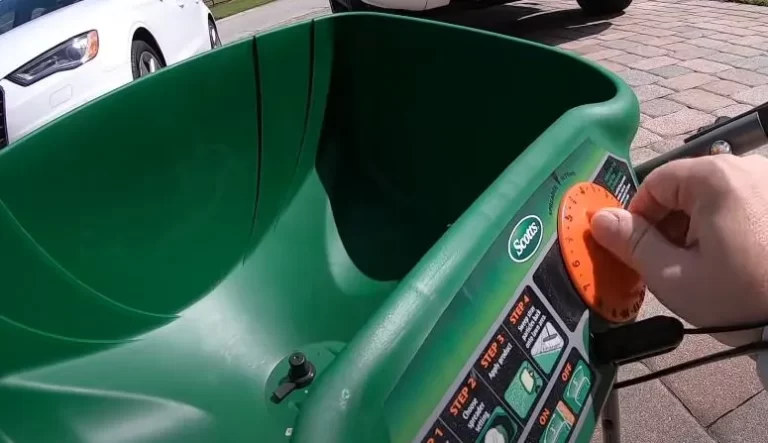
Rate Setting Control Panel
This panel allows you to dial in the optimal rate setting for dispensing. Settings typically range from 1 to 10 or 1 to 15, depending on the spreader model. Higher numbers provide a wider swath.
What to know:
- Use manufacturer rate charts to determine correct setting
- Start low and adjust as needed for even coverage
- Ensure indicator arrow points to desired numeric setting
EdgeGuard
The curved EdgeGuard frame surrounds 3 sides of the spreader to keep materials from scattering. The tapered design allows controlled dropping of fertilizer, seed or de-icer.
What to know:
- Keeps application neat and targeted
- Prevents waste onto sidewalks and driveways
- Provides a 6-foot swath width
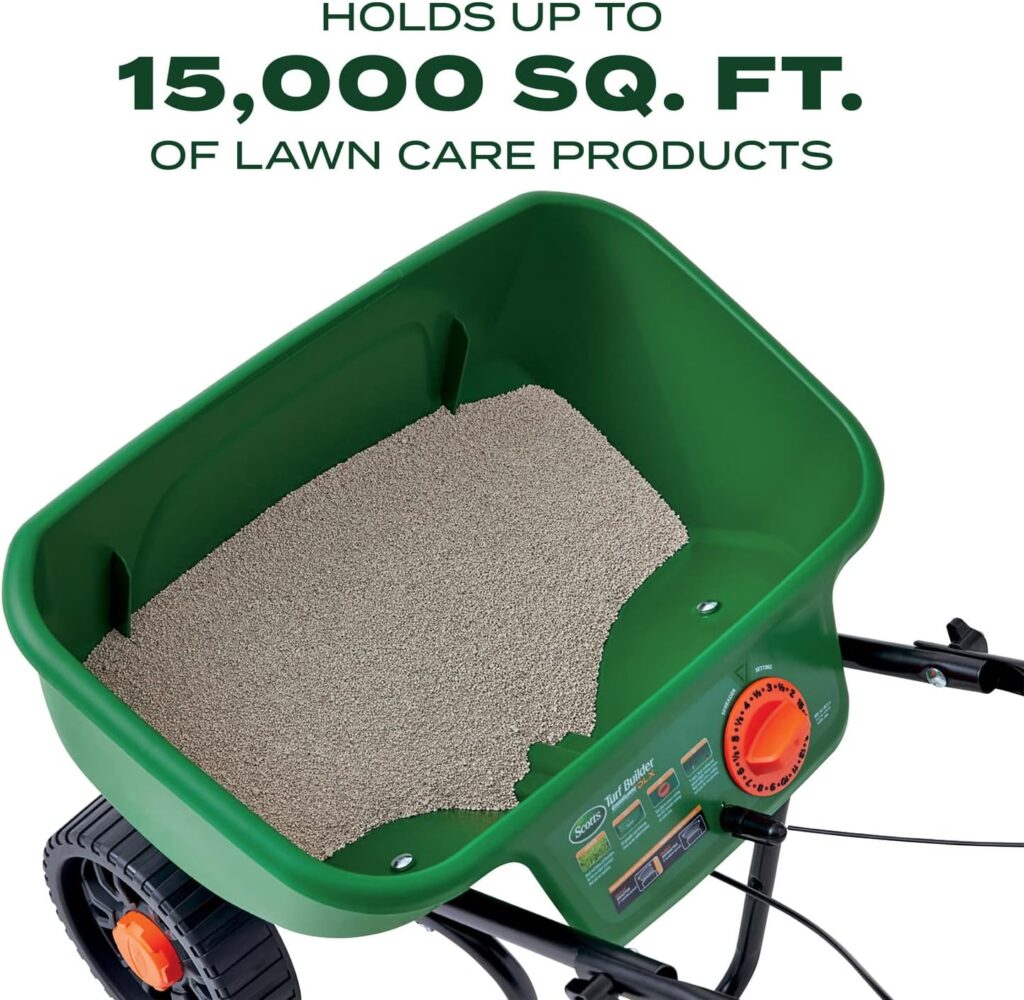
Overview of Scotts Edgeguard Spreader Models
The Scotts Edgeguard line includes a range of broadcast spreader models to meet different lawn care and budget needs:
- Small and compact size perfect for city lawns or tight spaces
- Lightweight at only 8 lbs when empty
- Rate settings from 1-4 lbs/1,000 sq ft
- 130 lb maximum capacity
- Durable construction with rust-proof frame
- Adjustable T-shaped handle for ergonomics
- Gear driven wheels provide precision rate control
- Settings range from 2-20 lbs/1,000 sq ft
- Holds up to 175 lbs of products
- Commercial grade and extra large capacity
- Heavy-duty build for extended wear
- Oversize pneumatic tires handle rough terrain
- Rate settings span a wide range
- Holds up to 225 lbs of materials
- Precision product placement with controlled spread pattern
- Welded steel housing prevents flexing
- 13.5” diameter wheels help navigate slopes
- Great for frequent fertilizer or de-icer application
- Rate settings from 4-22 lbs per 1,000 sq ft
There are also Scotts Edgeguard rotary and hand-held spreaders optimized to prevent stray granules. This guide focuses on push spreaders but all Edgeguard models utilize special encasing to keep application tidy!
Benefits of the Edgeguard Design
Precise Application
The tapered EdgeGuard ramp allows products to drop at an optimal rate for an even, 6-foot spread pattern. This precision helps ensure granules cover the lawn uniformly without narrow gaps or thick overlapping.
No More Stray Product
The unique enclosed design prevents fertilizers, grass seed and de-icers from scattering past your lawn’s perimeter. No more waste courtesy of the wraparound EdgeGuard barrier.
Reduced Cleanup
Say goodbye to the days of sweeping fertilizer off the driveway or out of flower beds! Keeping product on the lawn saves time on post-application cleanup.
Crisp Edges
Get the most out of your lawn care dollars by keeping materials exactly where intended. The EdgeGuard provides a precise lawn boundary to eliminate overlap onto gardens, landscaping and hardscapes.
Use Less Product
With a controlled, edge-to-edge distribution of seed, fertilizer and de-icer, you’ll use less product compared to open spreaders. Limit waste while saving money!
The ingenious Scotts EdgeGuard improves spreading accuracy and efficiency. Your lawn gets an ideal covering of amendments without collateral damage to surrounding areas. Less hassle, less product, beautiful results!
Demystifying Scotts Edgeguard Spreader Settings Charts
To maximize the effectiveness of your Scotts broadcast spreader, you need to calibrate the settings properly based on the product and desired coverage rate. This is where Scotts’ spreader settings charts come in handy!
These charts help you easily determine which numeric setting to use on your Scotts spreader to achieve a specific application rate. But with different versions for various spreader models and products, the multitude of Scotts charts can be confusing. Let’s decode them:
Fertilizer Settings Charts
When applying Scotts fertilizer, reference the settings chart listed on the bag itself. Settings are tailored to that exact product formulation to provide correct nutrient coverage.
You can also utilize Scotts’ online rotary and drop spreader settings for fertilizer charts. These cover various Scotts formulas, listing conversions for both pounds of nutrients and pounds of product per area.
Grass Seed Settings Charts
Because grass seed varieties have differing sizes and weights, you’ll need specific guidance to meter out the ideal volume. Consult the grass seed settings chart for your Scotts spreader model based on pounds of seed per 1,000 sq ft.
Comparison Settings Charts
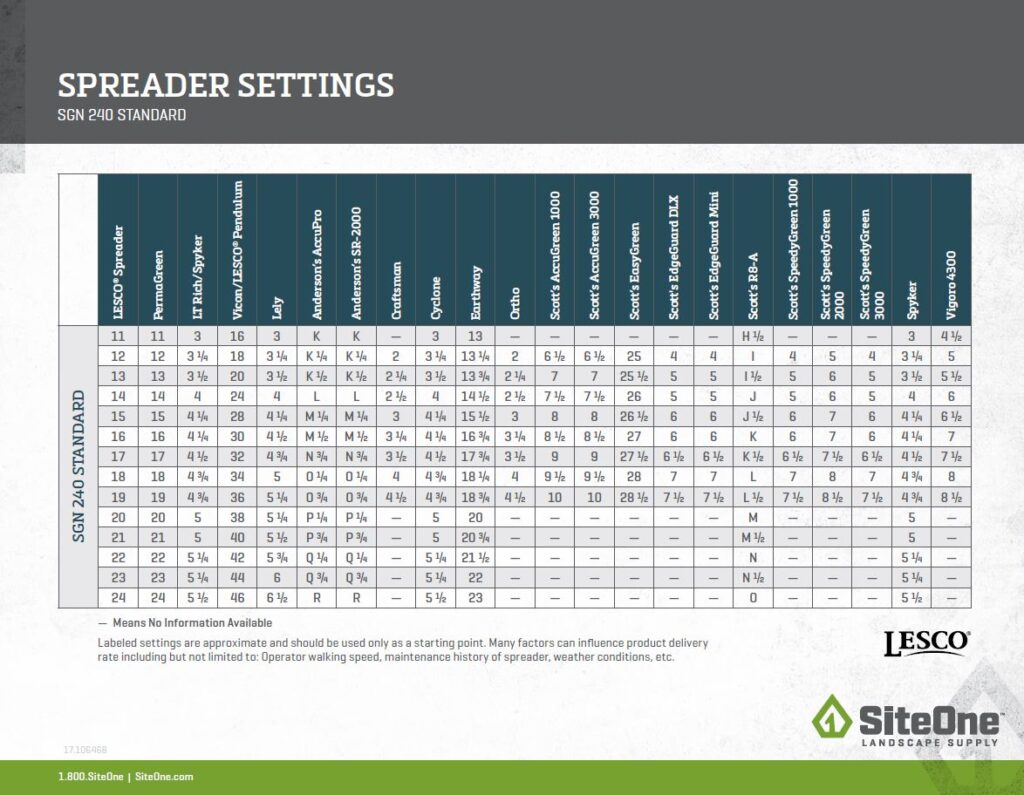
How do the numeric dial settings on a Scotts EdgeGuard DLX compare to those on a Scotts EdgeGuard Mini model given the same coverage rate?
Scotts provides cross-reference spreader comparison charts allowing users of different broadcasters to achieve uniform coverage for a given application rate.
You can also find third party resources comparing Scotts rotary spreader settings vs. drop spreader models like the Scotts WIZZ. These confirm corresponding settings across spreader platforms.
Pounds Per Square Footage
Many Scotts spreader settings charts denote application rates in pounds of product per 1,000 square feet of lawn area. This helps calibrate how much material to apply based on your unique lawn size.
Typical lawn fertilization rates:
- 3-4 lbs per 1,000 sq ft for general purpose fertilizing
- 5-6 lbs to correct nutrient deficiencies
- 1-2 lbs for seasonal maintenance
Pay attention to whether the rate denotes pounds of actual nutrients (nitrogen, phosphorus, potassium) or total pounds of fertilizer product. You’ll need more total product pounds to achieve equivalent nutrient pounds.
Pounds Per Acre
Other Scotts resources and older spreader models use pounds per acre as the benchmark application rate. Know your lawn’s square footage to convert.
- Roughly 20,000 sq ft = 0.5 acres
- So 5 lbs per 1,000 sq ft x 20 = 100 lbs of fertilizer per 0.5 acres
This lines up with a common recommendation of 200 lbs of fertilizer product per acre. Paying attention to density units is key for proper spreader calibration!
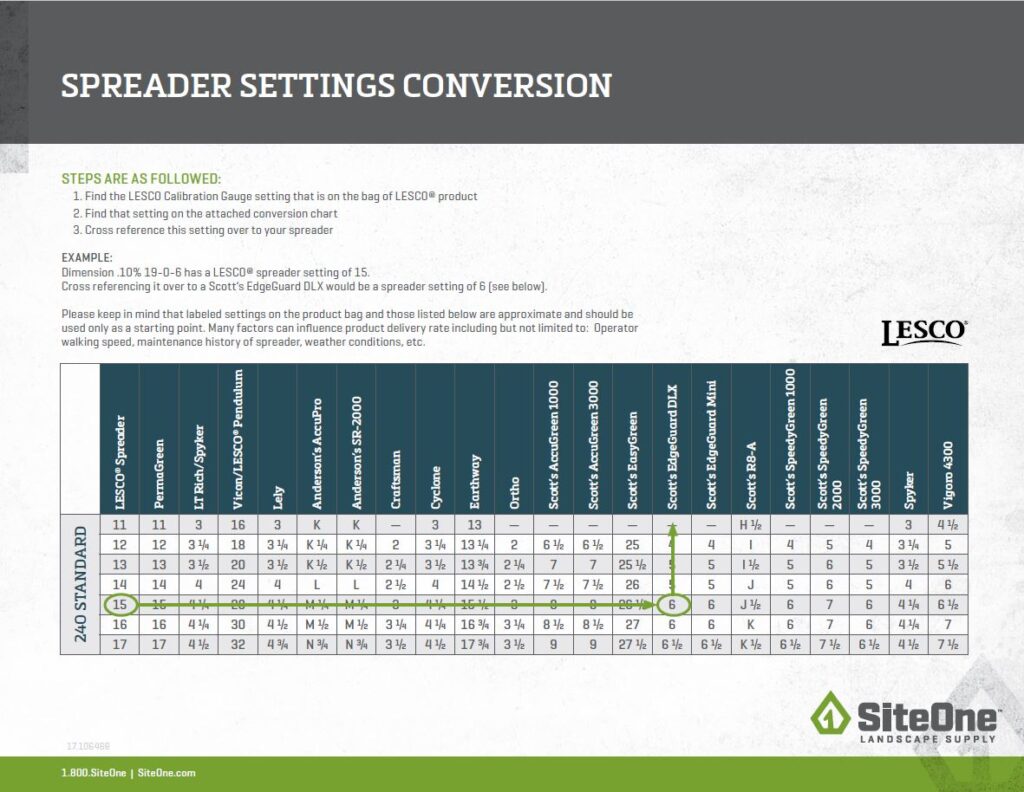
Conversion Charts for Different Setting Scales
Navigating through various setting scales can be challenging, especially when different lawn care products use distinct measurement systems. To simplify the process for users of the Scotts Edgeguard Spreader, conversion charts play a pivotal role. Let’s delve into the details of conversion charts, explaining how they work and how they assist in ensuring precise and accurate application of fertilizers or seeds.
Understanding Conversion Charts
Conversion charts serve as a bridge between different setting scales, providing users with a quick reference to find the equivalent settings on their Scotts Edgeguard Spreader. These charts are particularly useful when a product provides settings in a scale that differs from the standard 1 to 15 scale on the spreader.
How Conversion Charts Work
- Identify the Provided Setting Scale
- Determine the setting scale mentioned on the product packaging or user manual of the fertilizer or seed you intend to use.
- Locate the Corresponding Conversion Chart
- Consult the conversion chart that accompanies your Scotts Edgeguard Spreader. This chart typically showcases various setting scales along with their corresponding numbers on the spreader.
- Find the Equivalent Setting
- Locate the setting number on the Scotts Edgeguard Spreader that aligns with the scale provided by the product. This number is your target setting for accurate application.
Importance of Conversion Charts
- Ensuring Precision
- Different brands and products may use unique scales for their spreader settings. Conversion charts eliminate the risk of miscalculation, ensuring that users apply the right amount of material for optimal lawn care.
- Compatibility Across Products
- With a conversion chart, users can confidently switch between different lawn care products without the hassle of recalibrating the spreader for each one. This flexibility simplifies the lawn care process.
- Time and Effort Savings
- Instead of spending time deciphering unfamiliar scales, users can quickly refer to the conversion chart. This saves time, effort, and potential errors in setting adjustments.
Example Conversion Chart
Below is a simplified example of a conversion chart for Scotts Edgeguard Spreader settings:
| Product Scale | Scotts Edgeguard Setting |
| Brand X | 8 |
| Brand Y | 12 |
| Brand Z | 5 |
This chart illustrates that for Brand X, users should set their Scotts Edgeguard Spreader to 8 for accurate application. Similarly, Brand Y corresponds to a setting of 12, and Brand Z aligns with a setting of 5.
By utilizing conversion charts, users can seamlessly transition between different products, ensuring that the Scotts Edgeguard Spreader dispenses materials at the desired rates specified by each manufacturer.
Frequently Asked Questions (FAQs)
What do the numbers mean on a Scotts EdgeGuard spreader?
The number on a Scotts Edgeguard spreader dial shows the application rate of the fertilizer. Thanks to the dial, you can easily adjust how wide the spreaders will be open, and fertilizers will fall.
How do you spread fertilizer with Scotts EdgeGuard?
To spread fertilizer with Scotts Edgeguard, select the application rate according to the fertilizer size (usually 1/3 of the settings) with the dial knob. Then add fertilizer and start spreading fertilizer in the lawn correctly.
What number should my fertilizer spreader be on?
The number of fertilizer spreaders depends on the particle size of the fertilizer. However, you should select 1/3 of the settings first. Then check whether the fertilizer is falling easily or not. If not, then open the spreader wider.
Conclusion
The right Scotts Edgeguard spreader setting is 1/3 of the dial knob. Suppose the spreader you have has 12 numbers on the dial knob; select 4. Then add fertilizer to the spreader to check whether it falls easily. In case the fertilizer falls easily, then there’s no issue. However, if the case is different, then select another number and open the spreader wider.


![Why Stihl Weed Eater Won't Stay Running [Reasons & Solution]](https://yardcurator.com/wp-content/uploads/2023/05/Why-Stihl-Weed-Eater-Wont-Stay-Running-.webp)